Autofill in Excel
Autofill is an interesting and valuable feature of Excel. Use the autofill feature to fill the Excel cells with data that follow a particular pattern stored in other cells. It automatically fills a series of cell.
For example, you want to create a monthly report in Excel where one column contains dates. You can either manually enter the date of each day one by one or use the autofill feature to fill the date in cells that follow a pattern. This feature is a very helpful feature for it.
Using autofill feature, you can auto-populate the data in a specific pattern horizontally and vertically.
What is autofill?
Autofill is a feature/function of Excel that recognize the series and fill the data in the corresponding row or column accordingly. When you drag the data in a direction (down, left, or right), it identifies the pattern of cell data and fills in other cells automatically.
To use this feature, we initially need data in one or two cells to recognize the pattern. Based on which the data will fill in other cells. It can generate all types of values (Number, text, date, etc.).
Excel fills the data in cells either by repeating the same values of the first cell or insert a sequence by recognizing the pattern of first cell and second cell.
Autofill Examples
We will show you the different examples for autofill feature to automatically generate and fill the cells that follow a particular pattern.
Example 1: Autofill data horizontally
Take an example in which we will try to automatically fill the data in cells horizontally by recognizing the data pattern.
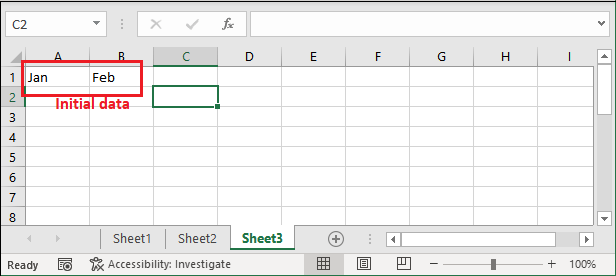
Step 1: We have initially taken the month names as an abbreviation in A1 and B1 cells.
Step 2: Now, select both the cell and hover the mouse at the bottom right corner of the selected cell. A small bold + sign will appear. (This is called Excel Fill Handler.)
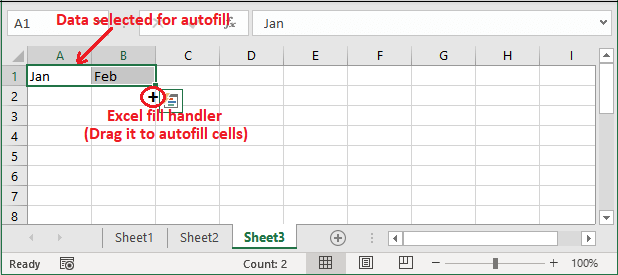
Step 3: Drag the + sign down in the Excel sheet. It will recognize the pattern as month and automatically fill the remaining month name in other cells.

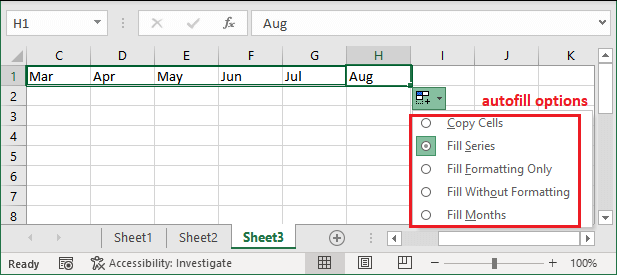
See that the data is generated and placed in cells horizontally. Here, it has inserted a sequence by recognizing the pattern of first cell and second cell.
Step 4: At the end of the generated values, an Autofill Options box will display.

Step 5: Click this Autofill Options box that will show many autofill options.
Example 2: Autofill data vertically
Take an example in which we will try to automatically fill the data in cells vertically by recognizing the data pattern. You have to select at least cells to recognize the pattern.
Step 1: We have initially taken the month names in A1 and B1 cells.
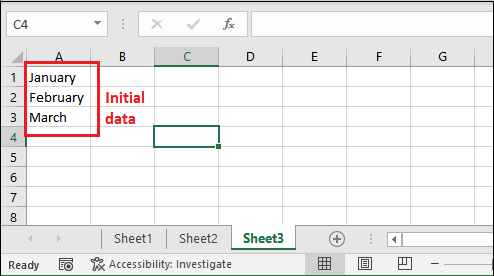
Step 2: Now, select more than one cell and hover the mouse at the bottom right corner of the selected cell. A small bold + sign will appear. (This is called Excel Fill Handler.)
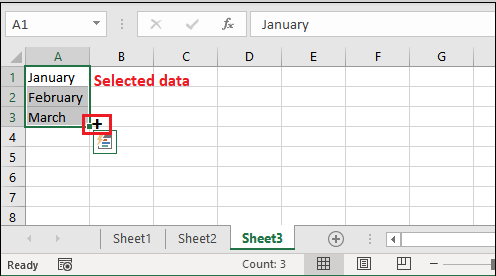
Step 3: Drag down the + sign vertically in the Excel sheet. It will recognize the pattern as month and automatically fill the remaining month name in other cells.
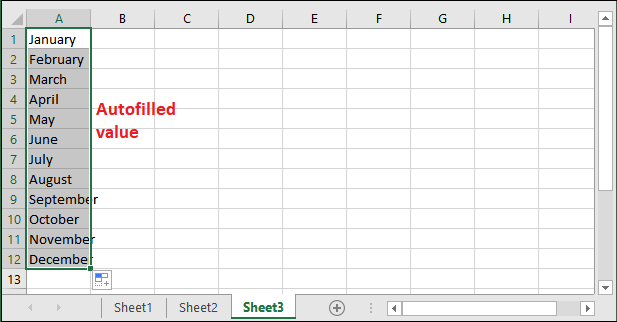
See that the data is generated and placed in cells vertically. Here, it has inserted a sequence by recognizing the pattern of first cell and second cell.
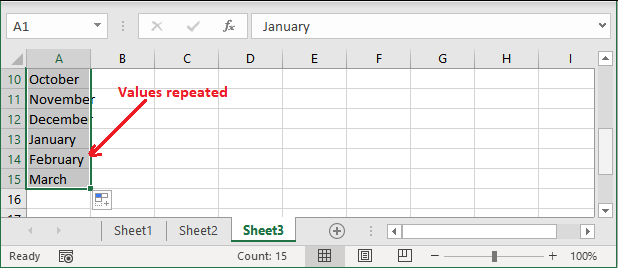
Step 4: If you drag this to more than the month in a year, it will repeat the value from the first one.
Example 3: Autofill the data in multiple rows/columns
Till now, we have used the autofill feature to generate the data either in a single row or single column. Excel allows to use the autofill feature to fill the data in multiple rows and columns at once.
You do not need to do anything complex. Steps are almost the same as the above two examples. This example will help you to autofill the cells for a range of cells.
Following are the steps for this:
Step 1: We have an Excel sheet in which we have initially taken the date in column A and day in B column cells.
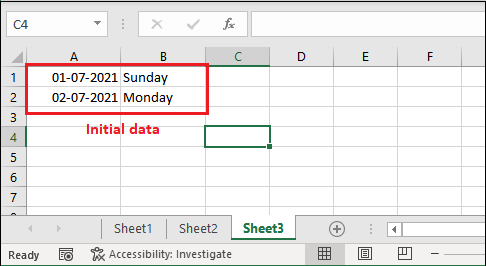
Step 2: Now, select both columns data and hover the mouse at the bottom right corner of the selected cell. A small bold + sign will appear.
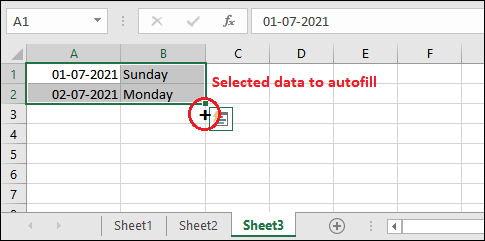
Step 3: Drag down the + sign below in the Excel sheet. It will recognize the pattern of column A as date and column B as day, then automatically fill the remaining month name in other cells.
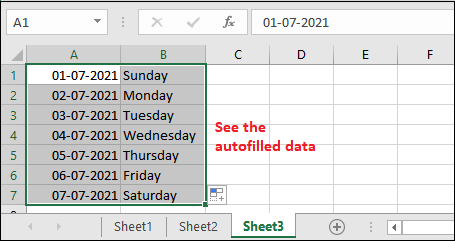
See that the autofill feature has generated the data for both columns and placed it in the below cells.
Example 4: Autofill repeated value
If you want the same value to be filled in other cells using the Excel autofill feature, you have to select only that cell whose value you want to repeat. This is like copying the same data in contiguous cells.
Step 1: For this example, we have taken this data which we want to fill in contiguous cells.
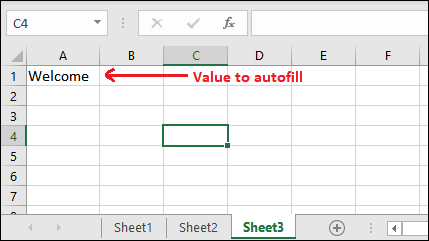
Step 2: Select it and hover the mouse bottom right corner of the selected cell, then drag the + sign (autofill) below.
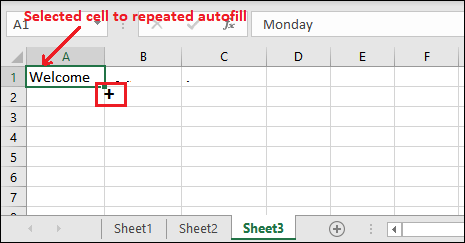
Step 3: See that – this time, it has generated and filled the same values in the below cells.
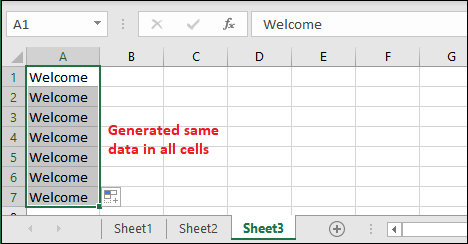
If you need the same values in continuous cells, this method is better rather than using the copy and paste option of Excel. This will save and effort of yours.
Example 5: Autofill the repeated date/days
Excel allows to autofill the same date in other cells using the Excel autofill feature. If you need the same date or day in other cells, you can use autofill, but the method we have used above is not useful.
If you try to follow the same steps as example 4 with day or date, this will not work. The above method is not complete enough; you have to follow some more steps.
Step 1: We have entered the current date using Ctrl+; key in A1 cell.
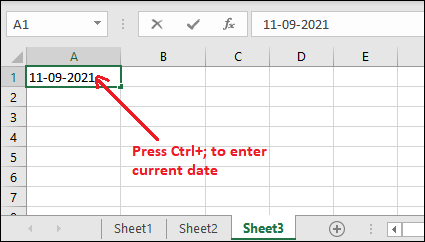
Now, repeat the same steps as example 4 (from step 2 to step 3).
Step 2: You will get the auto-filled values in a specific pattern (increasing order) like this –
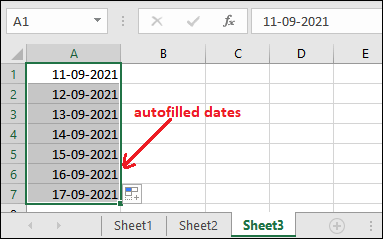
Step 3: Generated values are still selected. Press the Ctrl+D command to change the generated dates to repeated dates (current date) on selection.
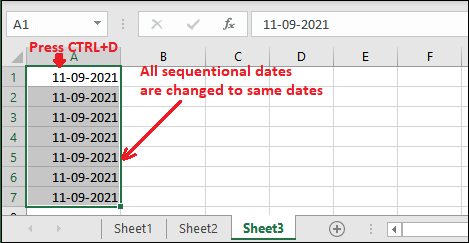
See that all auto-filled cells are containing the repeated date now.
Autofill Options
Use Autofill Options to fill the specific data in Excel cells generated automatically using the Excel autofill feature. For example, weekdays, days, months, years, series, etc. These options are visible when you use the autofill feature; an Autofill Options box displays at the end of the auto-generated values.
Let us take an example to see that how these autofill options work to autofill the weekdays dates. Weekdays refers to the working days from Monday to Friday. When you select the Weekdays options, it fills the cells with weekdays dates.
Steps to fill the weekdays date in cell using Excel autofill
Step 1: Enter a date in a cell and select it to autofill the dates in other fields.
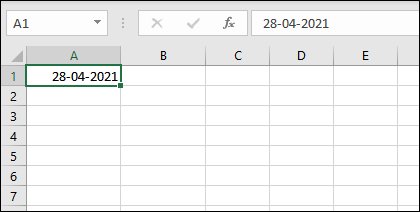
Step 2: Drag the autofill (+) sign down to other cells and see it has auto-populated the dates in a series of the recognized pattern.
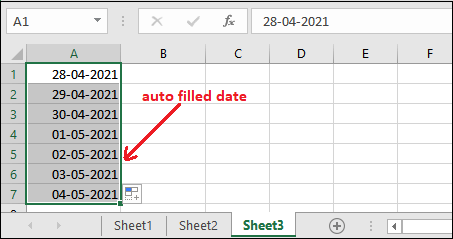
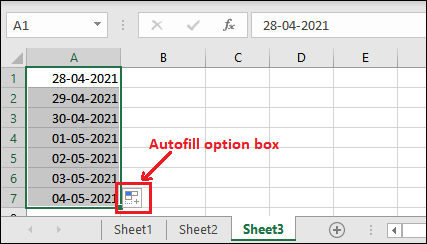
Step 3: At the end of the generated values, an Autofill Options box will display. Click this Autofill Options box that will show many autofill options.
Step 4: Here, click the Fill Weekdays option in the list.
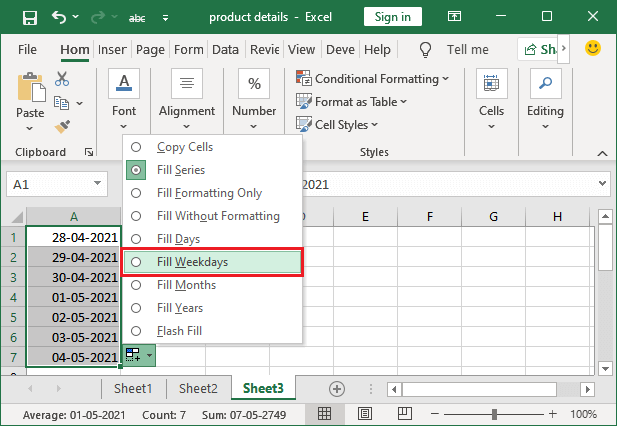
Step 5: You will see that all the auto-filled dates are changed to weekdays dates.
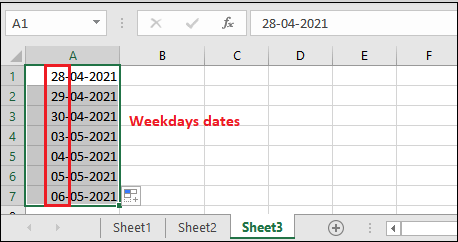
Tip: Weekdays refers to the working days from Monday to Friday. When you select the Weekdays options, it fills the cells with weekdays dates.
Hence, you can work with autofill options like this. It also has several other options in the list. Use them whenever needs accordingly.


